Solar Build Construction Management
Scan to join — no app, no login. You present the slides; questions pop as live polls.
Join at
…
Room code
····
0 joined
Introduction
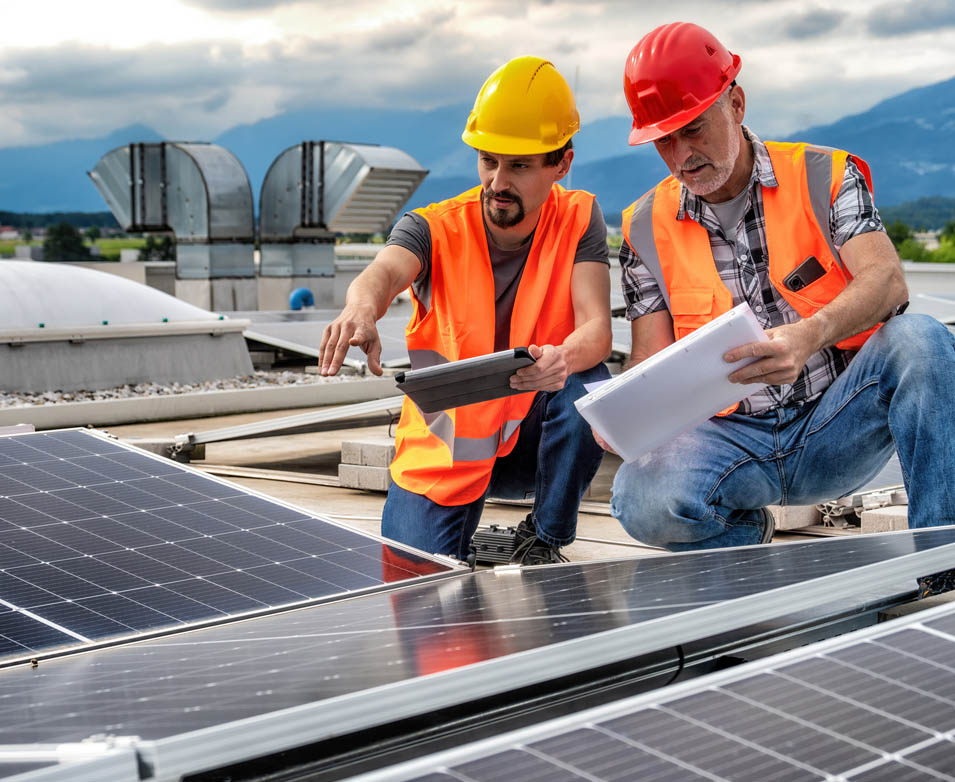
Site evaluation: Purpose

What is the purpose of a site evaluation?
A solar site assessment is the crucial first step to determine the best location for the solar array. This ensures that a solar energy system will operate efficiently. It involves evaluating a potential location to determine, firstly, if it is suitable and, secondly, how to optimize its output. A site assessment considers many factors, such as:
Solar potential
Check the site’s latitude and longitude, average daily sun hours, and other factors to determine the best location for the solar modules. Depending on these factors, solar modules can be designed to face the sun either throughout the entire day or for part of the day.
Shading
Study the amount of shading from trees, buildings and other objects, which can reduce the performance of the solar modules. If a building is surrounded by trees and is highly shaded, it is going to get very little production, especially during peak summer months. If the roof is too shaded, determine if there is an alternative place to mount the modules. Check if another roof, such as a garage roof, is available and suitable. A ground mount may be a better option.
Orientation
The best orientation for the solar modules depends on the site’s location and the time of year. The ideal orientation is facing southwest or south, because the modules can capture more sun with the curve of the sun as it sets in the west. Even if the orientation is different, there are many ways to design the best option to get the maximum production to match energy consumption.
Roof conditions and construction
The construction and tilt of the roof play a key role in optimizing the energy production of solar modules. Check the type of roofing. Is it a shingle or metal roof? Is it a flat or pitch roof? Is the roof sturdy enough to support the modules? Preferably, a solar system should be installed on a relatively new roof that can bear the weight of the installation. Roof condition can impact both cost and system design.
Access
Check how easy or difficult it is to access the roof and the site. If the building is tall, a crane or telehandler might be needed to get the modules to the roof. Are the site and solar modules easily accessible for future maintenance? This also impacts the costs, so check whether the budget allows it.
Electrical capacity
Verify that the building's electrical system can support the increased electrical demand of the solar system. Is the electrical supply a single-phase line or a three-phase one? This affects how the solar array connects to the building and electrical grid. Generally, most buildings use a single-phase connection which can handle 10-kilowatt (kW) systems. Larger systems, such as 500 kW or 1 megawatt, require a three-phase connection.
Other obstructions
Check if the building roof has skylights, chimneys, vents, any mechanical systems or heat pumps. Check whether there are any obstructions near the building such as other buildings, trees that may grow taller, water tanks, dish antennas, or boundary walls.
Site evaluation: Tools

It's important to bring all necessary tools for the survey of the site. Here's a list of some key tools:
GPS
The GPS helps determine latitude and longitude. Design tools can pinpoint where the building is located and calculate expected sun hours based on location. A smartphone can also be used to take GPS locations.
Ladder with standoffs
A ladder with standoffs provides a higher reach and better stability when working at heights. These ladders are also useful for accessing the roof or attic space.
Digital camera or cellphone camera
Use cameras to document the site location, rooftops, and surroundings to aid in calculations, modelling, and planning.
Compass
A compass helps determine cardinal directions to calculate roof orientation and place modules for maximum sunlight exposure.
Measuring tapes
Use 100-foot and 25-foot measuring tapes for accurate measurements.
Writing instruments
Record notes during site visits to ensure accuracy.
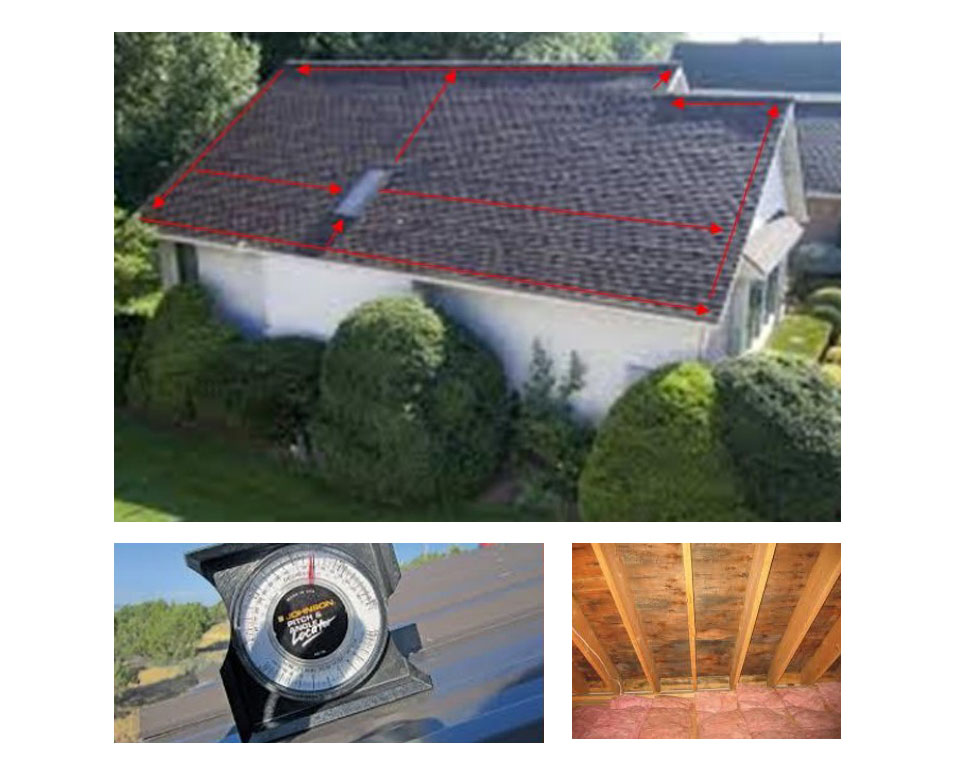
Angle Finder
This tool measures the roof’s pitch to help determine module placement for optimal energy production.
Site evaluation: Pictures
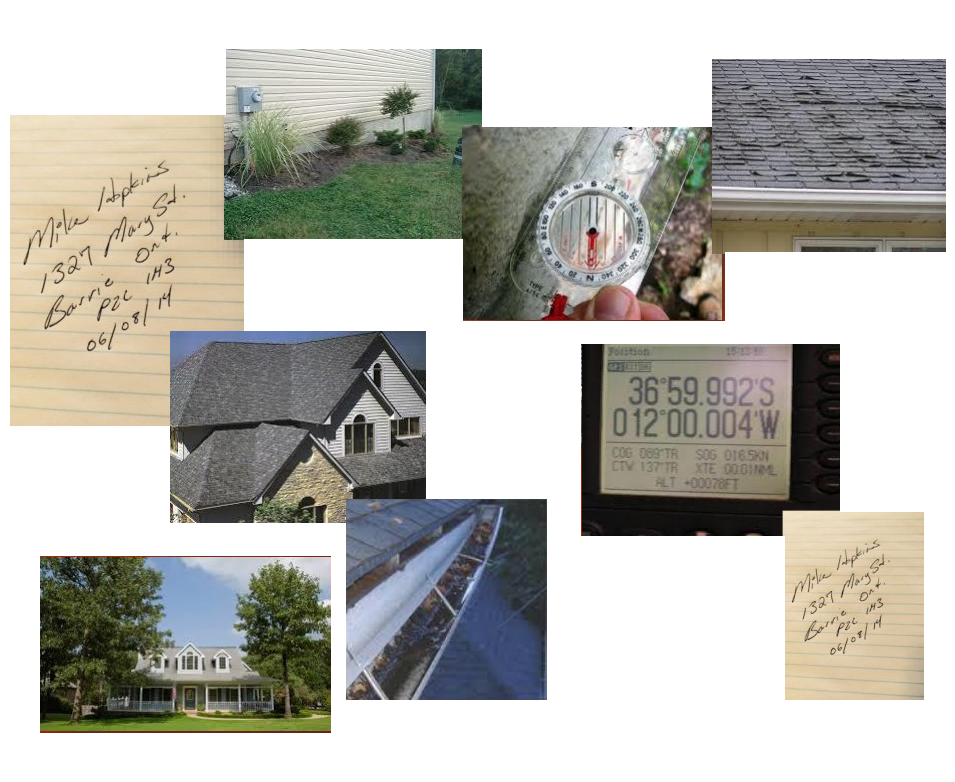
Take pictures of everything when you are at the site. They are free, and very valuable. Place them in a file afterward.
From the conditions of the roof, the ceiling, distance between the rafters, even of your own measurements—take pictures of everything! Even if you are also writing down all the data, pictures provide invaluable help after the site evaluations, when the designing of the system begins.
Pictures can help minimize follow-up questions by team members or other parties. They may even help avoid scheduling additional site visits.
Site evaluation: Compass readings
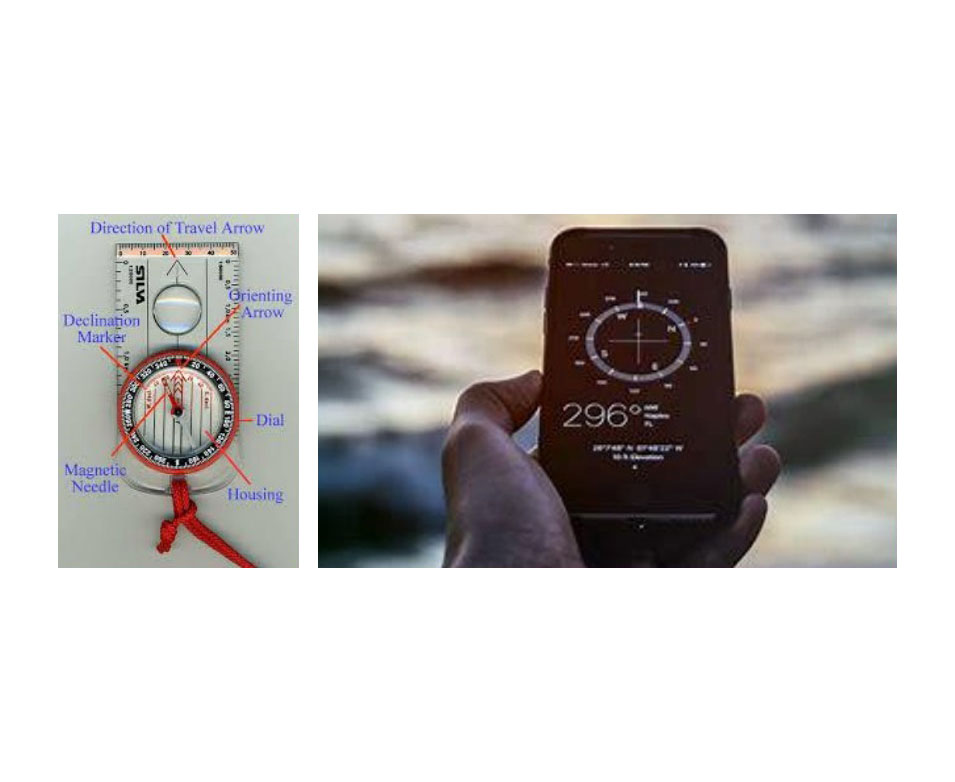
A solar array should be pointed as close to true south as possible (180 degrees).
Google Earth is a good tool to figure out cardinal directions (azimuth).
What is azimuth? What is azimuth?
Site evaluation: Magnetic declination and GPS
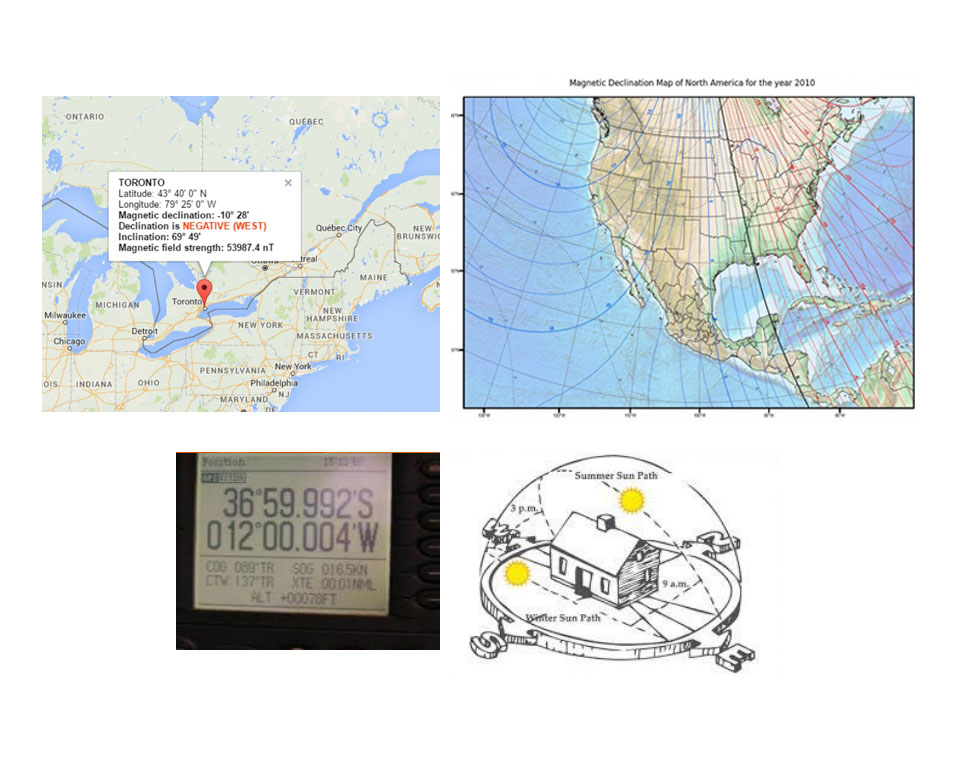
Magnetic declination is the angle between magnetic north and true north. Declination is positive east of true north and negative when west.
Your GPS will tell you the building’s exact location coordinates, including the site’s latitude and longitude. This information is critical for determining the sun path.
In the photo, you can determine the cardinal directions easily. Look at the summer sun path. The modules should face south, ensuring the building receives great sun exposure through the day. Next, look at the winter sun path, where the sun is lower on the horizon. In the winter months there is less solar resource because the sun’s path is lower in the sky and the days are shorter.
Roof collecting data: Measurements – 1
Once a building has been selected, take precise measurements of the roof dimensions, including both inside and outside edges, distance to all vents or skylights, roof condition, and the type of roof (for example, shingles, metal). Use the angle finder to determine the roof’s pitch. And, as a general rule, take lots of pictures!
Draw diagrams by hand and take detailed notes. The collected data can be mapped into modelling software. Match your dimensions of the roof to the Google images. This is an easy way to double check and verify your work.
For longer measurements, use the 100-feet cloth tape. Additionally, Google Earth can assist in measuring buildings remotely.
Roof collecting data: Measurements – 2
Obtain the structural drawings of the building for review by structural engineers, who must confirm whether solar modules can be safely installed on the roof. If no structural drawings exist, document as much detail as possible through detailed pictures and notes:
The roof’s interior structure The thickness and spacing of the rafters The attic's accessibility and truss design The worksite
Perform a shading analysis by walking around the site. Identify any large poles or cell towers that could cast shadows. If there is a large tree, consider whether it needs trimming or if it provides seasonal shade.
Site evaluation: Ground collecting data
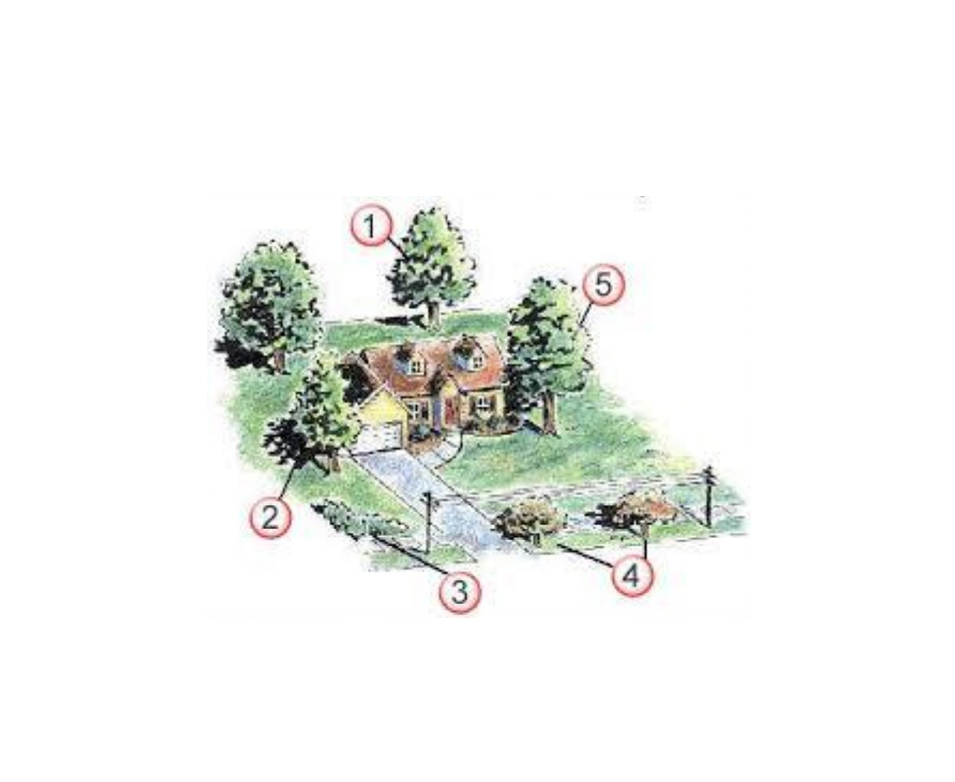
Ground data collection involves gathering detailed information about the site itself. Is the building on level ground or is it on a hillside? Note accessibility issues for materials and equipment. Create a diagram mapping all objects and their distances from the building. Take photographs of the building’s surroundings to assess shading concerns. Evaluate soil conditions. Is the soil rocky or soft? A soil analysis may be required to assess pylon stability.
As shown in the photo, this site has both large and small trees. The larger ones may need trimming, while the smaller trees will grow over the next decade—so plan accordingly. The building is on a hillside, and utility poles are present. All of these factors should be considered when designing the system.
Site evaluation review
Why is it important to calculate azimuth for solar projects?
Roof collecting data review
What is a shading analysis? Does that mean we have to draw paintings?
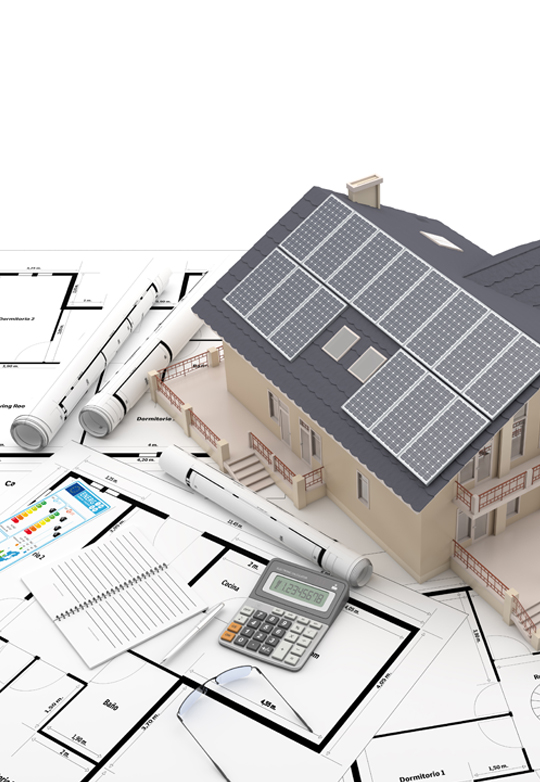
Solar modelling software
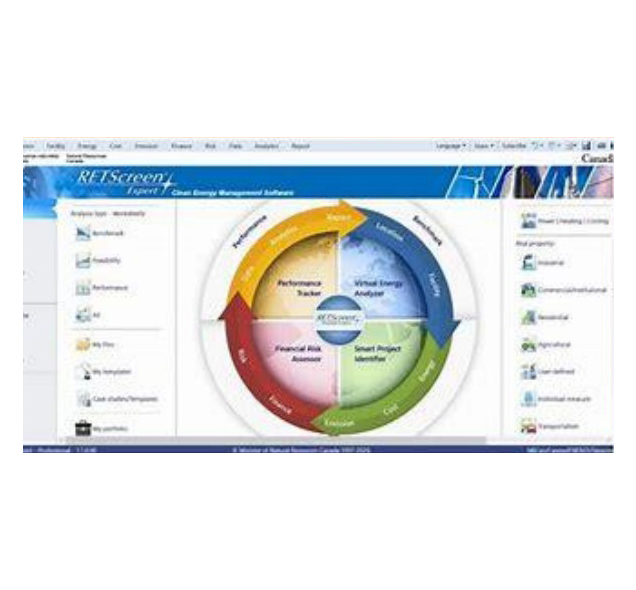
Solar modelling software aids in system design, energy consumption analysis, cost estimation, feasibility assessment, and production forecasting based on environmental factors.
Helioscope is one such software. It allows users to plot modules onto a roof and determine their stringing configuration. The software provides estimated energy production for each month of the year, illustrating seasonal variations in sunlight availability.
The software also integrates historical weather data from the past century, which improves its forecasting accuracy. For instance, January and February typically have lower solar output due to snow-covered modules, which the software accounts for in its projections.
Moving to the next phase of the solar build

By this point, all necessary data has been collected, and energy consumption has been mapped to align with the solar system design.
Discussions with structural engineers have been completed - they have reviewed all measurements and confirmed the feasibility of the system. With their approval, the project can now proceed to construction.
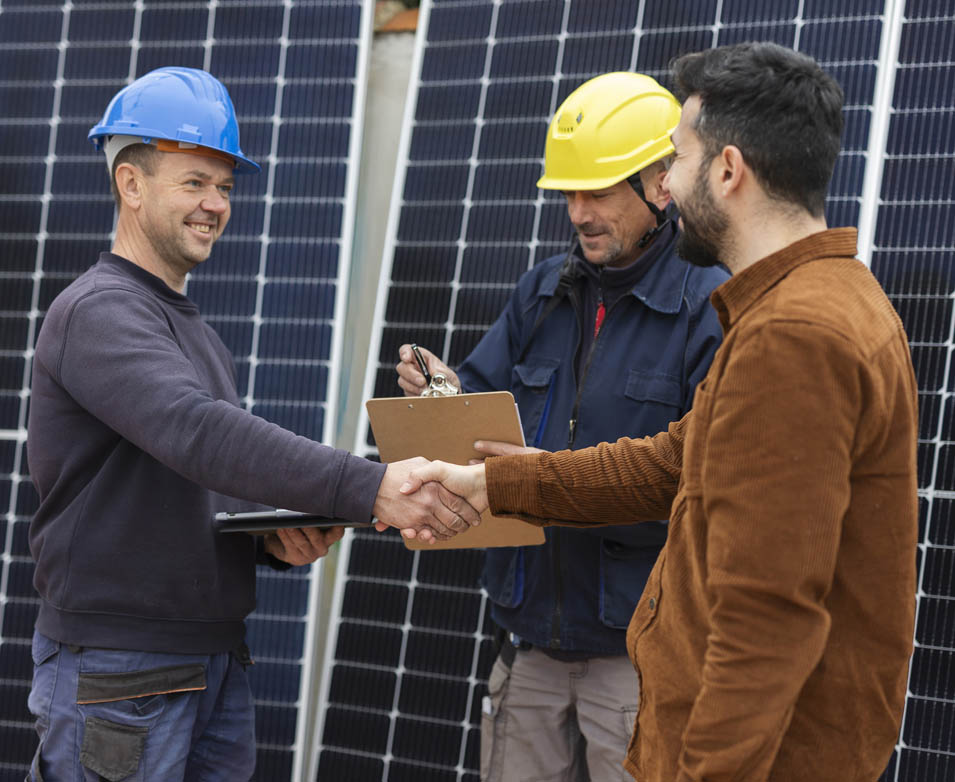
Construction process: Building approval form
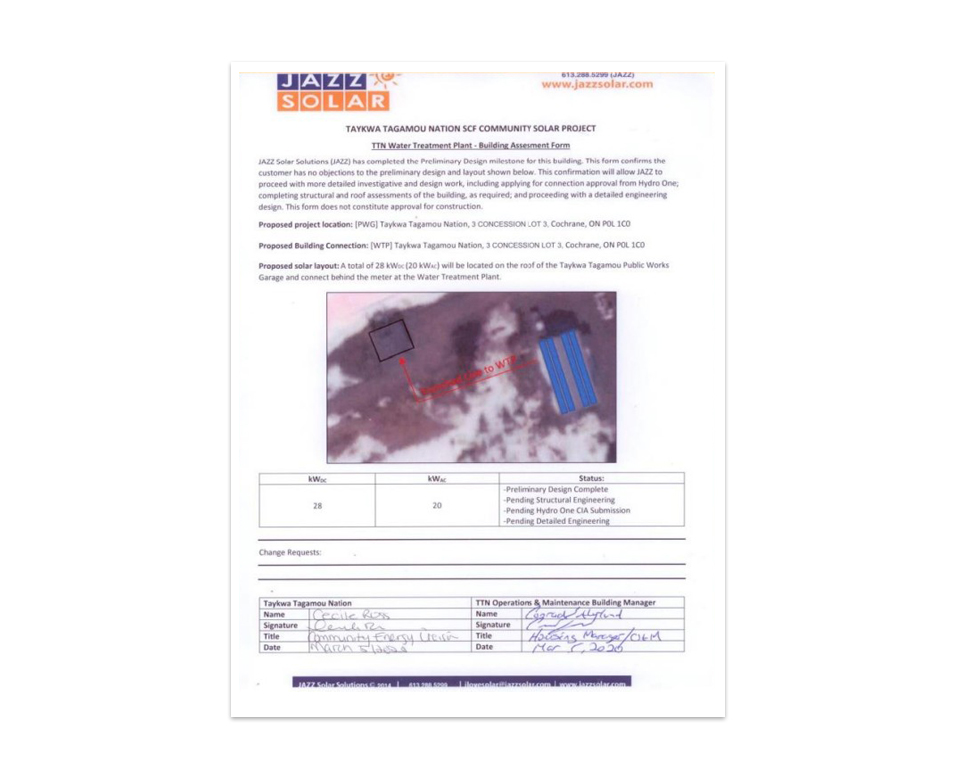
Before construction begins, obtaining a signed Building Approval Form is critical. It is a key milestone in the project.
This form outlines the site conditions, proposed construction, and installation plan. It includes:
Array location, size, and configuration Construction timelines Approval from building owners/managers
All relevant parties must sign off before construction begins.
Design reviews

The next step involves community stakeholders—building managers, Chief and Council, the Energy team, and the CEC—who will review the system before installation.
Similar to the Building Approval Form, this process ensures stakeholder input is considered.
For instance, if there are heat pumps on the roof, building managers must confirm that access remains unobstructed. Additionally, they need to ensure that roof drainage and ventilation systems remain accessible post-installation.
All concerns must be addressed before proceeding to construction.
Contractor site meetings
Contractor site meetings occur regularly throughout the build process.
Before construction, schedule site meetings between the contractor, the Energy team, building managers, residents, and key personnel. These meetings help:
Discuss site conditions Address contractor concerns Ensure proper logistics for equipment storage Minimize disruptions to the community
Upon equipment arrival, coordinate secure storage arrangements with contractors.
Contractors are typically paid based on milestone completions, such as installation, inspections, and commissioning. Clear communication of these phases is essential.
Procurement—1
Procurement should occur in parallel with site evaluations.
Once the necessary materials and services are identified, decide which equipment will be procured directly from manufacturers and which will be purchased by the contractor.
As a general rule, you should procure:
Solar modules Racking systems Inverters Certain electrical disconnects
The contractor will procure:
Wiring, clips, conduits, and miscellaneous components
Procurement—2: Solar equipment

Procurement of solar equipment includes choosing the right solar supplier along with equipment. It is very important to procure all the materials and equipment needed for the project before you start construction. If anything is missed out and procured later, it will affect the budget and timelines.
What do you need to know? What do you need to know?
Construction process: Building approval form review
Why are sign-offs needed before the construction of the solar project begins?
Procurement: Solar equipment review
Why must I get everything in writing? I trust my partners, so a verbal agreement should be enough.
Construction of systems

Contractors will review the design, engineered drawings, electrical layouts, and the assimilation to the utility as well. Contractors review the drawings because they get to know different pieces of equipment from different sets of drawings—and they need this information to be able to build the system to spec.
Contractors will coordinate equipment shipments and locations of delivery. JAZZ also supports this. The company supports both the community and the contractors in coordination, especially for the equipment that it purchases.
Contractors take care of construction-related equipment and infrastructure. For example, if equipment such as a sky jack or fork lift has to be rented, it is better to leave it to the contractor. It is also more streamlined this way—they know where and when to accept the equipment.
Ensure that all workers onsite meet regulatory requirements, especially if they are working at heights.
Work closely with contractors, as well as coordinate between building managers and contractors, to ensure that timelines and budget are met.
Community updates

The Energy Team and Community Energy Champions can provide valuable assistance to the project team throughout the construction. They can keep the community updated by providing key information such as scheduled progress reports, details of any incidents and their resolutions, including any property damage, updates on the EPC progress, and any delays or changes to the build. They can also guide the community when, post the build, permits are being closed with electrical and safety authorities, and with Hydro One.
By providing clear and accessible information, the Energy Team and Community Energy Champions can help address people’s concerns and maintain a regular flow of information to the community throughout the construction phase.
The spreadsheet in the photo is an example of part of a project schedule. Such documents not only help keep track of project schedules but are also useful for presentation to the community.
Construction final completion
On final completion of the construction, the direct current (or DC) and alternate current (or AC) parts are commissioned differently. Therefore, the contractors working on the projects have slightly different sets of checklists to complete upon final completion.
DC contractors will give you a commissioning report, if required in the contract.
AC contractors provide Electrical Safety Authority (ESA) certificates. Both DC and AC contractors, however, have to provide an as-built drawing. Any deviations from the original drawings and design, made during the build, have to be indicated in red.
What is an ‘as-built’ drawing? What is an ‘as-built’ drawing?
Warranties
Warranties ensure product quality and performance. There are two main types.
Manufacturer’s Warranty
A manufacturer’s warranty is a written guarantee to the buyer of a product. Its terms assure the repair or replacement of the product, if necessary, within a specified period after the purchase. The serial numbers of the products have to be recorded in your database. Such document control is important, as you or your team members will need to refer back to this serial number in case the product has to be sent for repairs or replacement.
In addition to the manufacturer’s guarantee that their product is free of defects, solar modules also come with a production guarantee. This assures a minimum initial energy production and a maximum annual production degradation.
Workmanship Warranty
A workmanship warranty provides the system owner with coverage against workmanship or installation errors. Any installation errors will need to be fixed at the expense of the installation contractor, including expenses for travel.
Say, for example, during an inspection you discover that one of the cables between the modules has disconnected. You can ask the contractor to fix it and replace any damaged modules. Again, document control is important here as you would have recorded the details—who went on the inspection, what date it was, what error they found, and pictures to prove your point—to share with the installation contractor and claim the warranty.
Document control

Project managers should create a database to store all the project documentation—the paperwork for the drawing, designs, approvals, notices, warranties, etc. All such information should either be saved on the server or in physical files and should be accessible to all team members to refer to.
This is helpful if, for example, in 10 years’ time you have to ask a contractor to repair or replace something. Then the relevant documents are saved and available readily, not lost to time or memory. As well, in situations where a manager may not be reachable, the documents are easily accessible to anyone who needs them.
Document control ensures organized storage, easy retrieval, security, compliance, and efficiency in managing critical information for decision making and future action.
Construction: Final completion review
Are as-built drawings the initial blueprints or plans created before the construction of a solar project?
Document control review
Why is document control important? How can we store documents properly?
Commissioning and maintenance

Before the system is activated, it needs to be checked thoroughly for adherence to the owner’s requirements, as well as applicable contract and warranty standards. The system should be commissioned by a professional after adequate operational and safety checks have been carried out.
Project requirements
Verify that the design meets the owner’s project requirements. Carry out checks to make sure that it has been installed the way it was designed.
For example: Have the correct number of modules been installed? A contractor may have forgotten to install maybe five out of 1,200 modules. So the actual build has to be verified against the project’s specifications.
Contract/warranty standards
Verify that applicable equipment and systems are installed according to the contract documents, manufacturers’ recommendations, and industry accepted minimum standards.
For example: There are certain areas on a module where it can be clamped when it is being attached to the racking, and certain areas where it cannot be attached. It actually voids the warranty if it is not attached in the right spots. So installation has to be verified against contract/warranty documents.
Operations checks
Verify installing contractors perform adequate operations checks.
For example: Make sure that the connection of the system to the building is done correctly. If it is not, then when the system is switched on, it can damage the electrical system of the building or damage the solar modules. So operations and safety checks are important.
Performance
Verify and document proper performance of equipment and systems. The contractors will carry out performance tests and prepare reports for the project management team.
For example: The equipment spec sheets indicate nominal performance. With this info and the system configuration, you can determine what the expected output of the system should be.
Operations and maintenance documentation
Verify that the operations and maintenance documentation left on-site is complete.
For example: If you had made the decision to have snow cleared off the modules, was it done? Has it been documented?
Adequate training
Verify the owner’s operating personnel are adequately trained. Verify that all personnel know the correct and safe procedures for good quality maintenance and monitoring.
For example: Check that the team in charge of cleaning the modules is using a soft cloth, not an abrasive broom.
Summary

Before we close this lesson, let’s have a quick recap of what we have discussed.
This training lesson focused on the essential skills and knowledge required to manage the installation of solar energy systems. It covered key aspects such as site evaluations and contractor meetings, roof and ground collecting data, solar modelling software, design reviews, obtaining approvals, and choosing the right solar equipment suppliers.
We also saw how document control ensures organized storage, easy retrieval, security, compliance, and efficiency in managing critical information for decision making and future action.
The lesson also explained how to oversee the construction process, ensuring that solar modules, inverters, and other components are properly installed according to design specifications and warranty requirements.
Thank you!